#Shortcodes: Create your own designed webinar landing & registration & ... webinar pages
By using your own page builder and add webinar functionality with shortcodes

Tobias
Last Update 2 jaar geleden
In this Video you will learn in easy steps how to add webinar registration functionality to your designed webinar landing pages.
In this post you will learn in easy steps how to add webinar registration functionality to your designed webinar landing pages.
Like our evergreen DEMO page:
Compared your own design to the standard WebinarIgnition registration page for evergreen/automated webinars.
Also available for live webinars.
Not all licenses provide shortcodes!
With version 2.10.1 (circa 15.07.2022)
- all licenses incl. Ultimate free could use the registration shortcode in live webinars. (only one shortcode)
- Registration shortcode in evergreen webinars is also available from Ultimate free onwards.
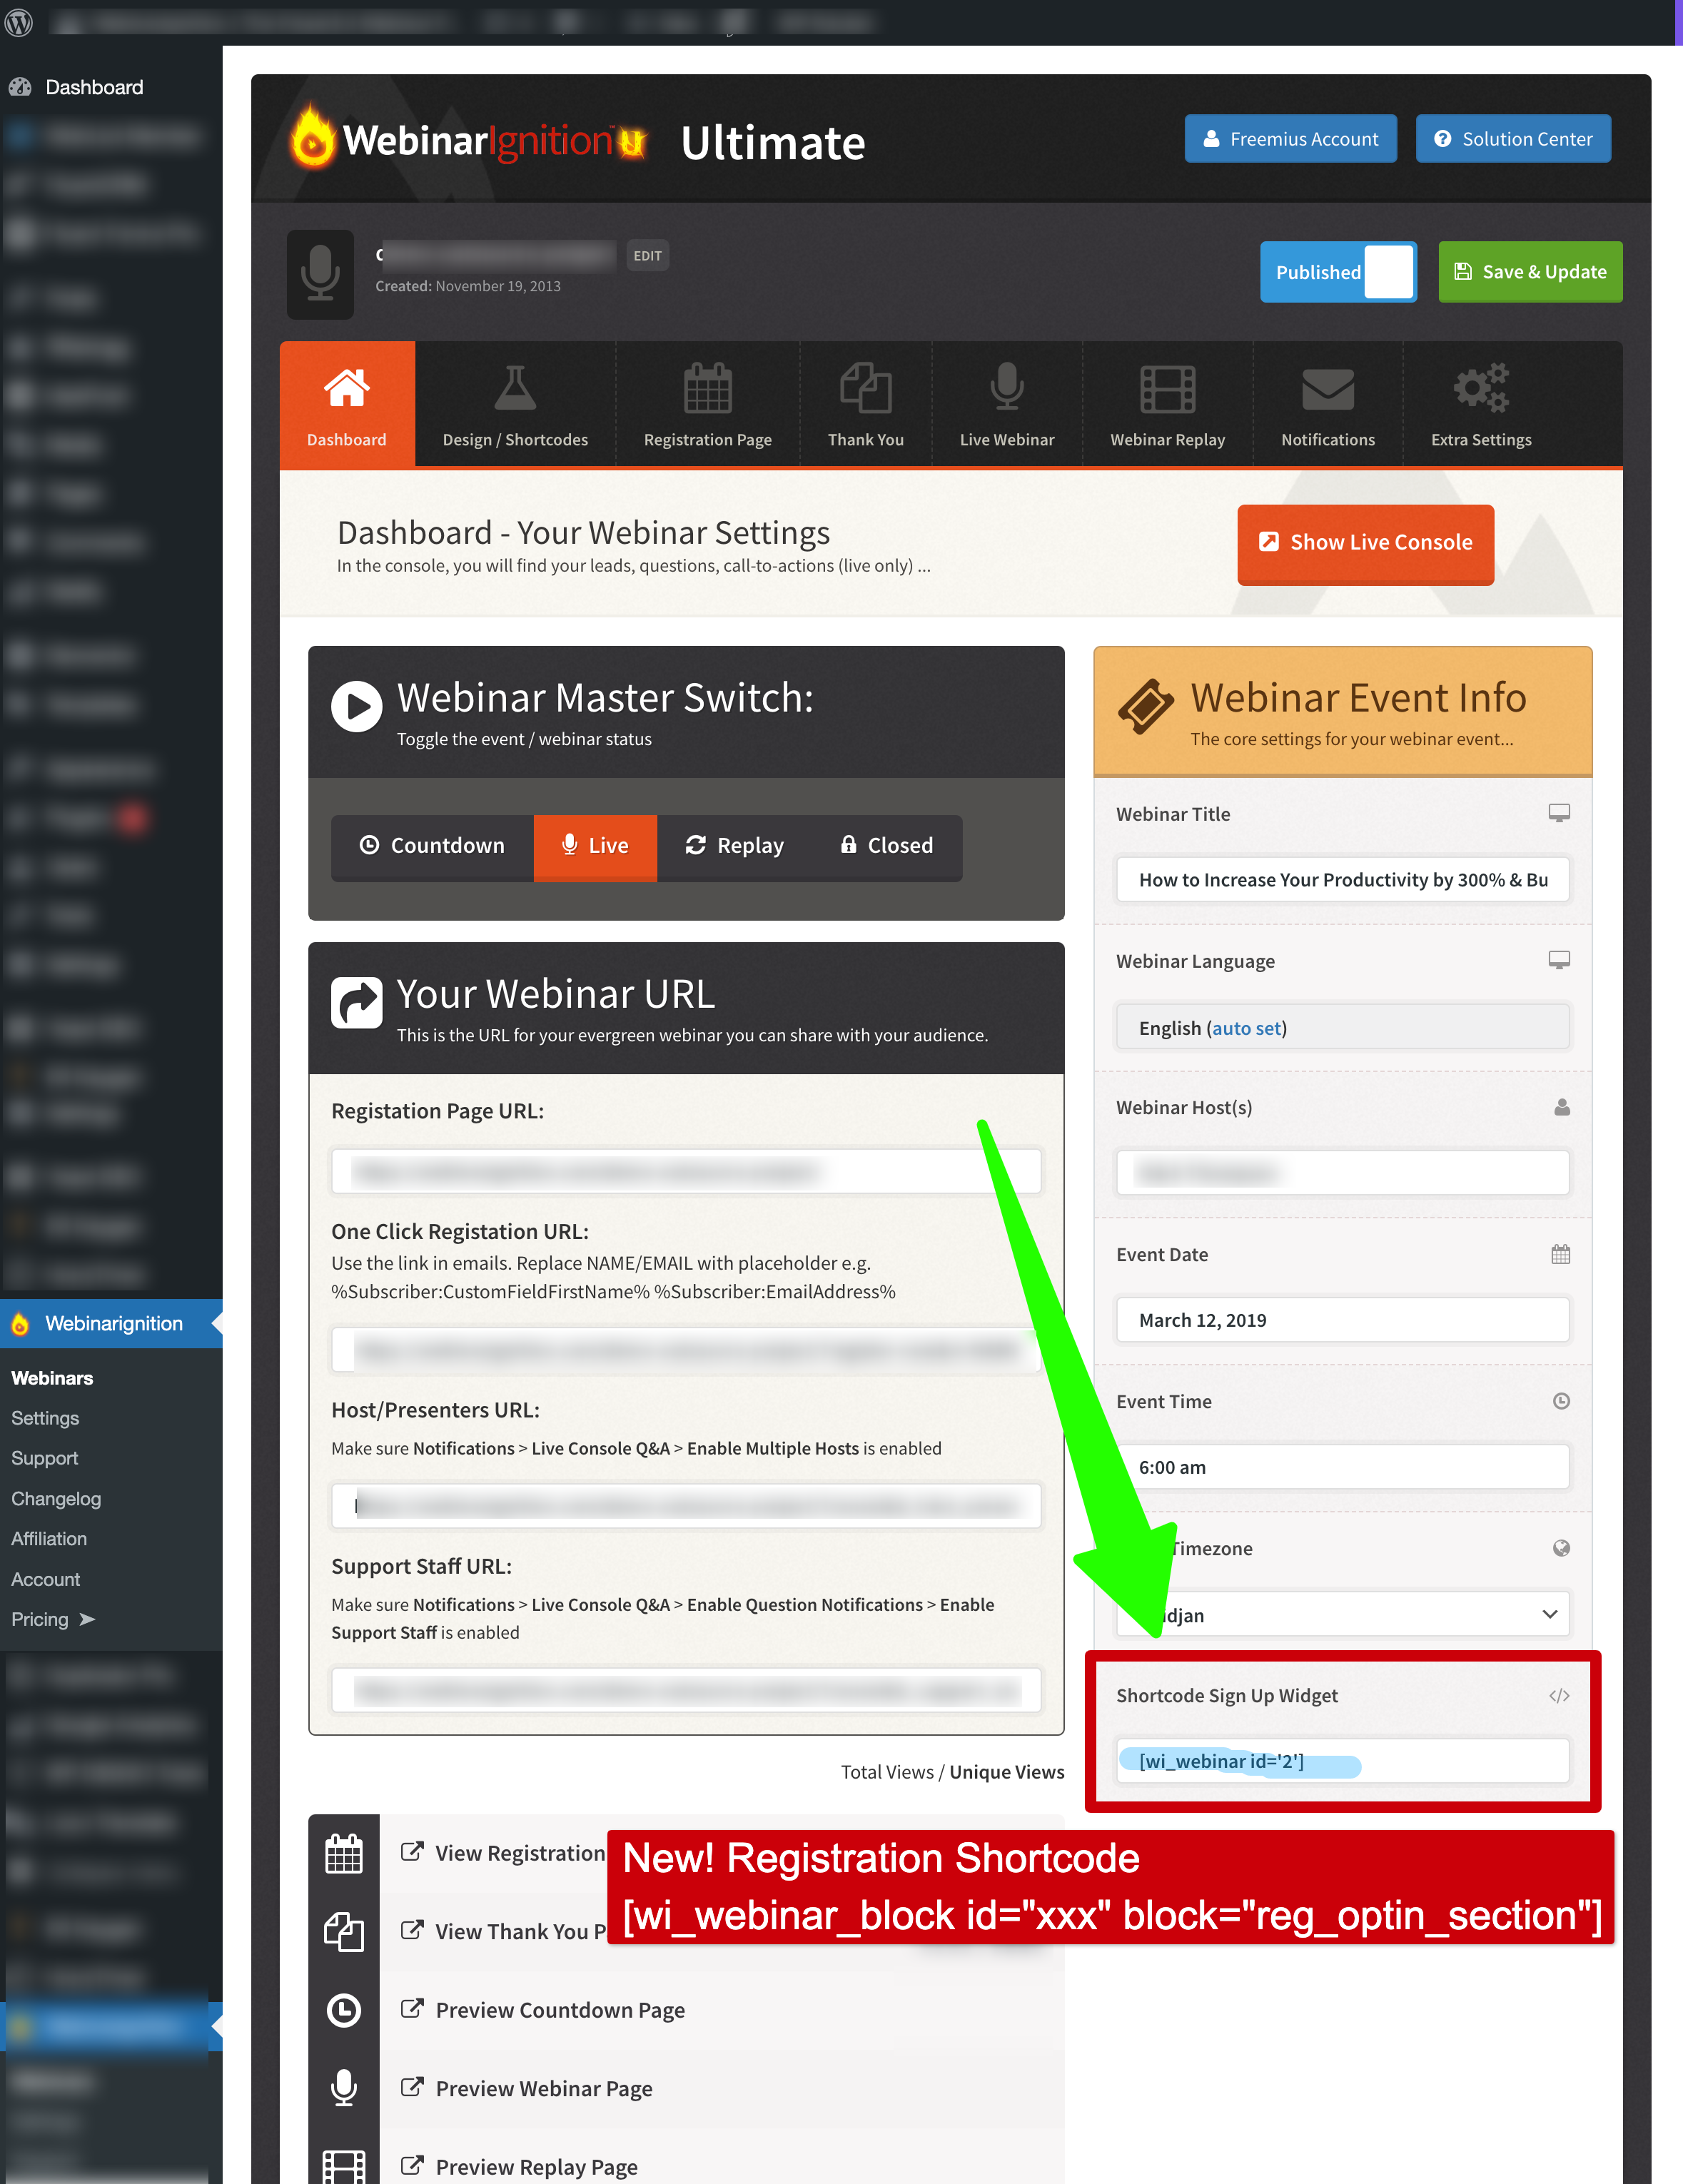
If you open an webinar settings you can find the registration shortcode in the first tab, called Dashboard. (See last image on this page please)
All shortcodes for all pages, different types in the Design/Shortcodes tab
in Evergreen Shortcodes, on Ultimate Free onwards.
in Live webinar on Ultimate Trial onwards.
Step by step tutorial to add webinar registration form to your own designed landing page.
To be prepared and that you can start setup your style.
Be sure you published, saved your registration page and created an evergreen webinar.
Please open WordPress admin area.
Open a evergreen webinar,
moved to "Design/Template" tab,
scrolled to "Select Registration page template",
selected the published registration page and
click save.
Now copy the shortcode for the registration.
Scroll to "Select Registration page template" again.
Copy the first shortcode.
Like this only with a different ID: [wi_webinar_block id="24" block="reg_optin_section"]
Next move to our created registration page by click "Preview Registration Page"
click "Edit page" in admin bar,
In my case the oxygen page builder opens.
What was prepared already:
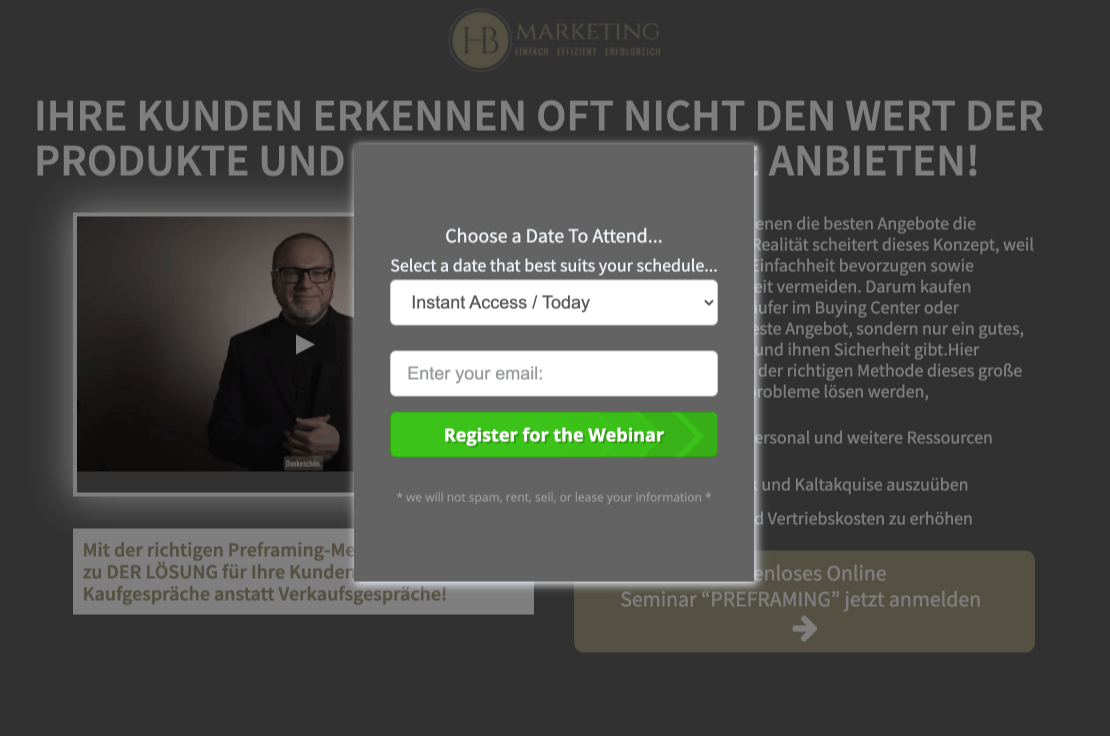
Added, styled and linked the modal window to the register button.
Please choose to add a shortcode to the modal
Next add the copied shortcode
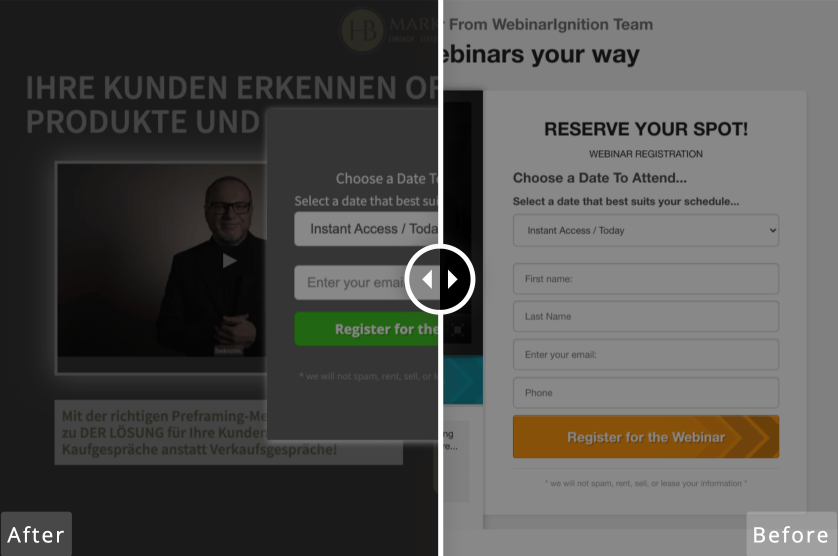
and see, a in this case un styled, preview of the registration form.
Save & preview the page.
Additionally
Let us have a look what you can do with the other registration shortcodes.
Last 2 shortcodes in the registration section allow you to show dates selection and optin fields without heading and if you like in one or two columns.
If you like your own headers above the registration form,
move back to the "Design/Template" tab copy the two shortcodes and can replace the existing one with them.
Now please add the headers and text you like to add via your editor.
If you like to style with your own CSS/Style
In "Design/Template" tab, is also an option "disable styles" completely so you can style all by yourself or by the help of a designer.
Next change the green button color to you own color.
Move to "Registration" tab and then open the last accordion
setup the color, save and review the results by clicking "Preview Registration Page" on top of the page.
Additionally to make the setup complete add or remove registration fields.
You can do it in the same accordion you can change the button color ("Registration" tab and then open the last accordion).
Thats all thanks for be her until the end and styling your webinar registration page with me.
In my eyes it is worth to invest getting an nice styled registration page ;-)
Thats not all: WebinarIgnition provides shortcodes for all webinar related pages like:
registration-, confirmation-, countdown-, webinar-, replay-pages.
The other pages can be designed and shortcodes could be added the same way as in the registration page.
Available Shortcodes