Aweber Integration
How To Integrate Your Aweber Form In Webinarignition

Tobias
Last Update 3 years ago
To integrate Aweber into Webinarignition, as with all auto-responder integrations, you need to get the raw html code to paste into Webinarignition. To do this, first sign into your Aweber account (the account to which you would like attendee information should be sent to upon registration).
Below: Webinar registration submitted to AWeber (15-08-2022)
Click on “Sign Up Forms” to start creating a form.
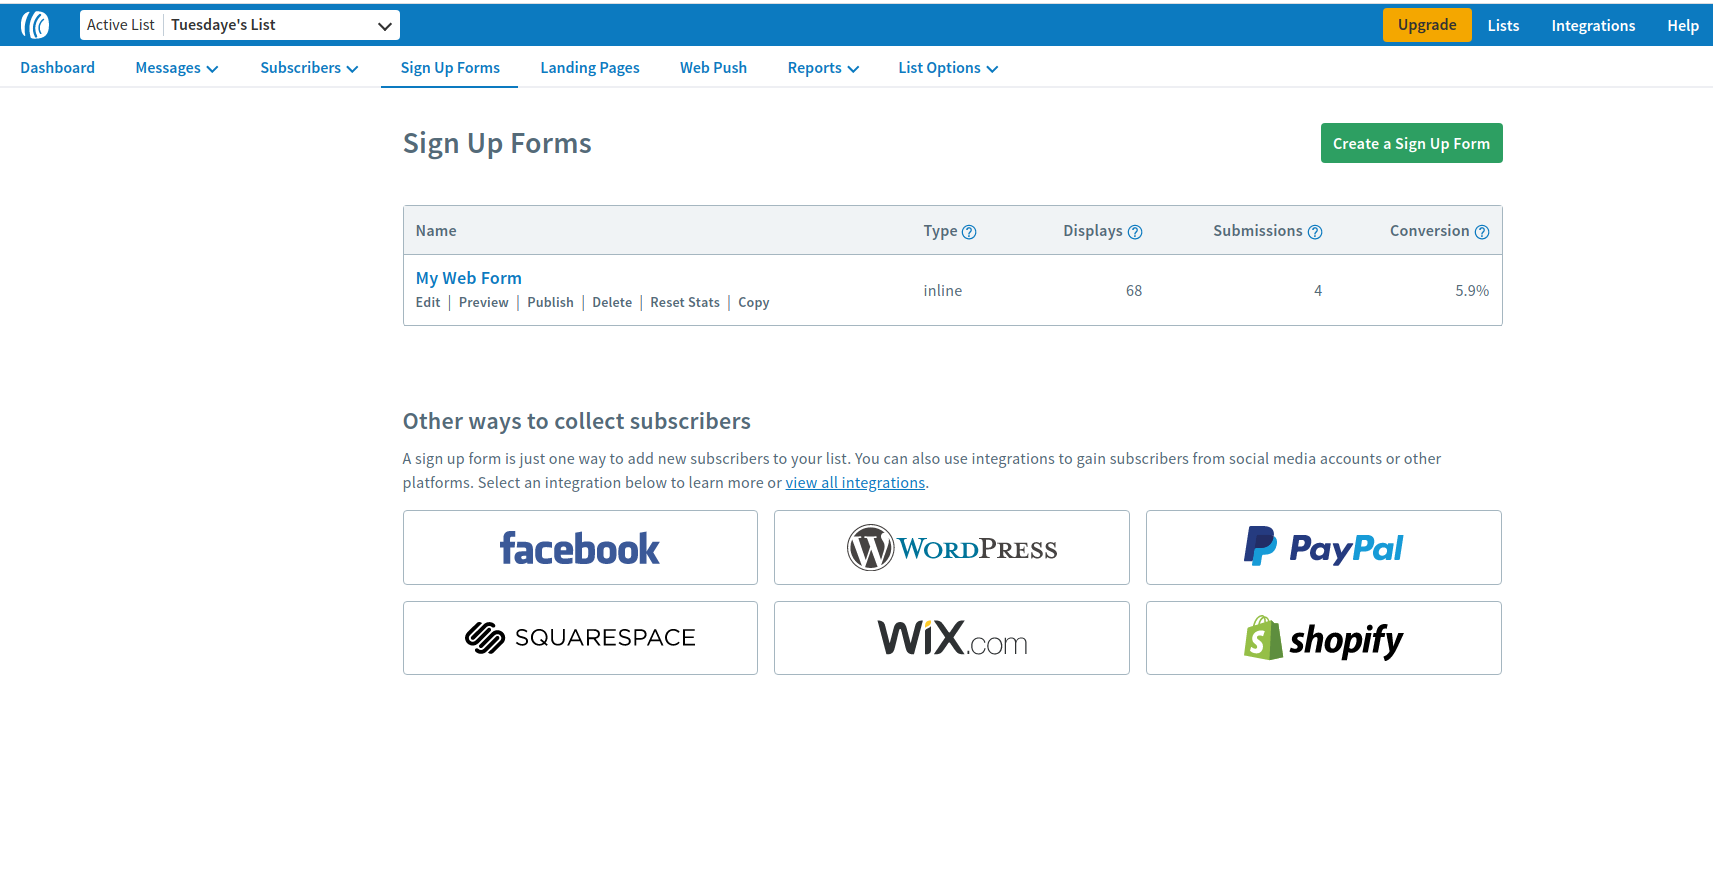
On the next step, click on “Create A Sign Up Form”.
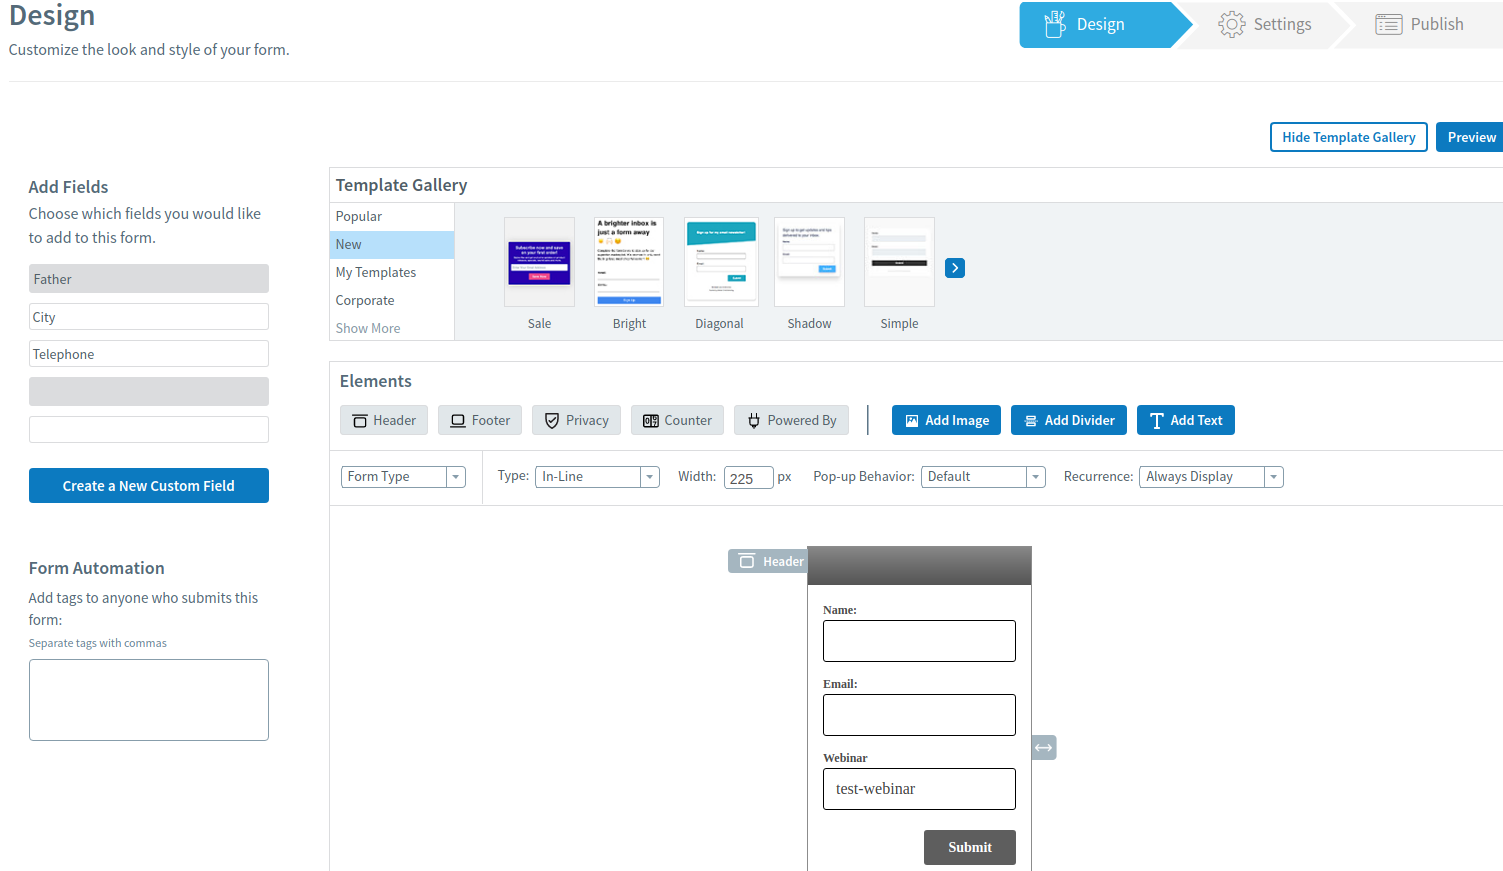
The name and email fields will be included in the form by default.
If you intend to include hidden fields (such as a hidden field with the name of the webinar), create a Custom New Field. This can be mapped to a hidden field in Webinarignition later. Make sure to take note of the name of the field as you will need to know this when mapping fields in Webinarignition later.
After creating your form (by including all the form fields you need), save your form, then go to step 2.
The settings on the next page (Step 2) are not used in WebinarIgnition, so you may ignore them. First save the form then go to the next step (Step 3).
On the next page select “I Will Install My Form”, then select “Raw HTML Version”
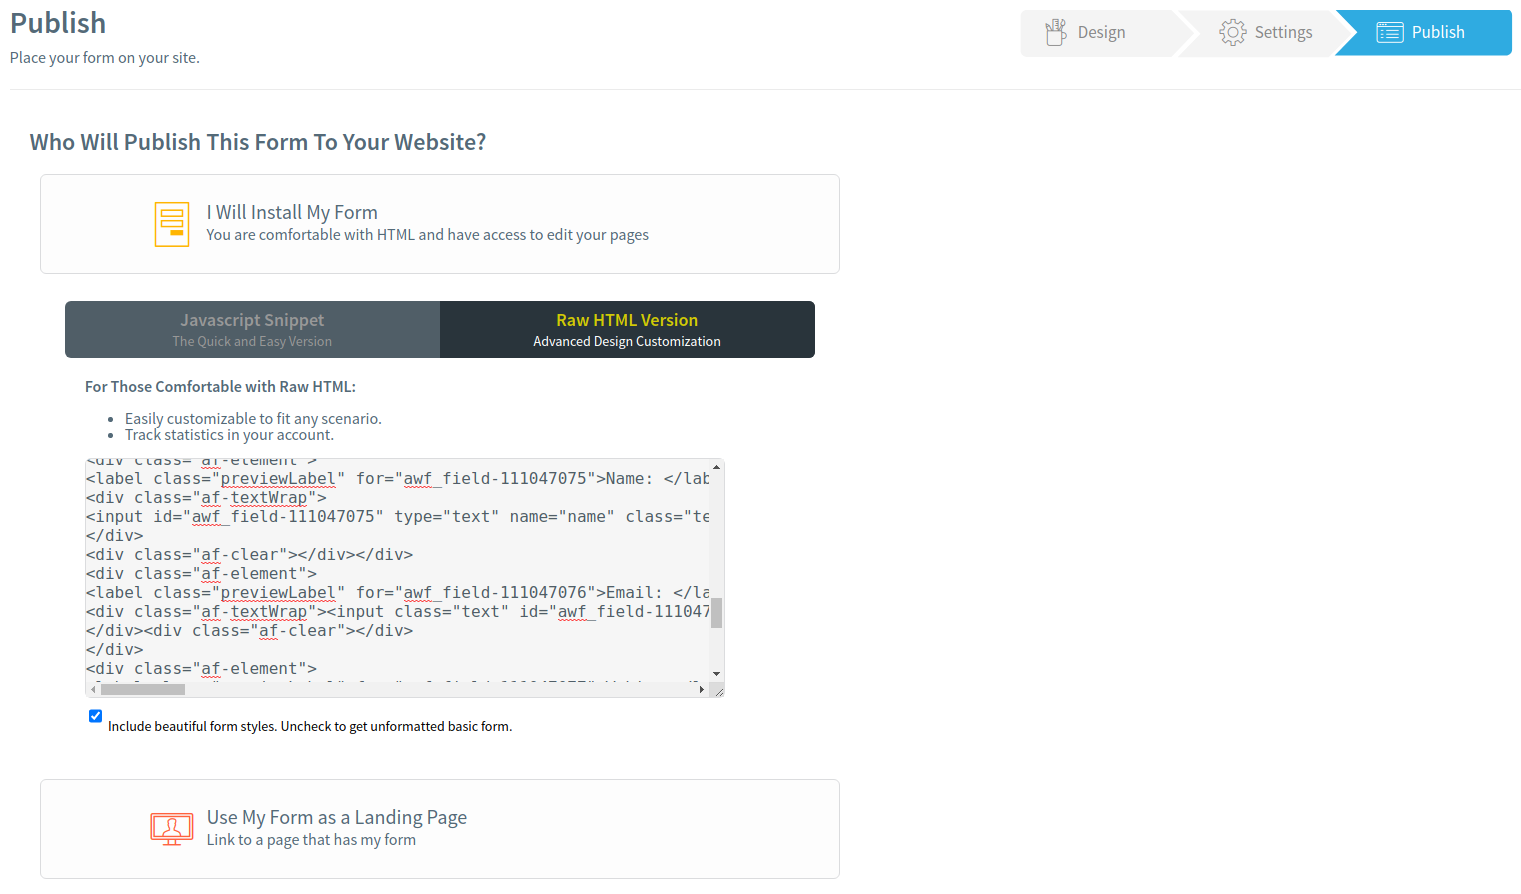
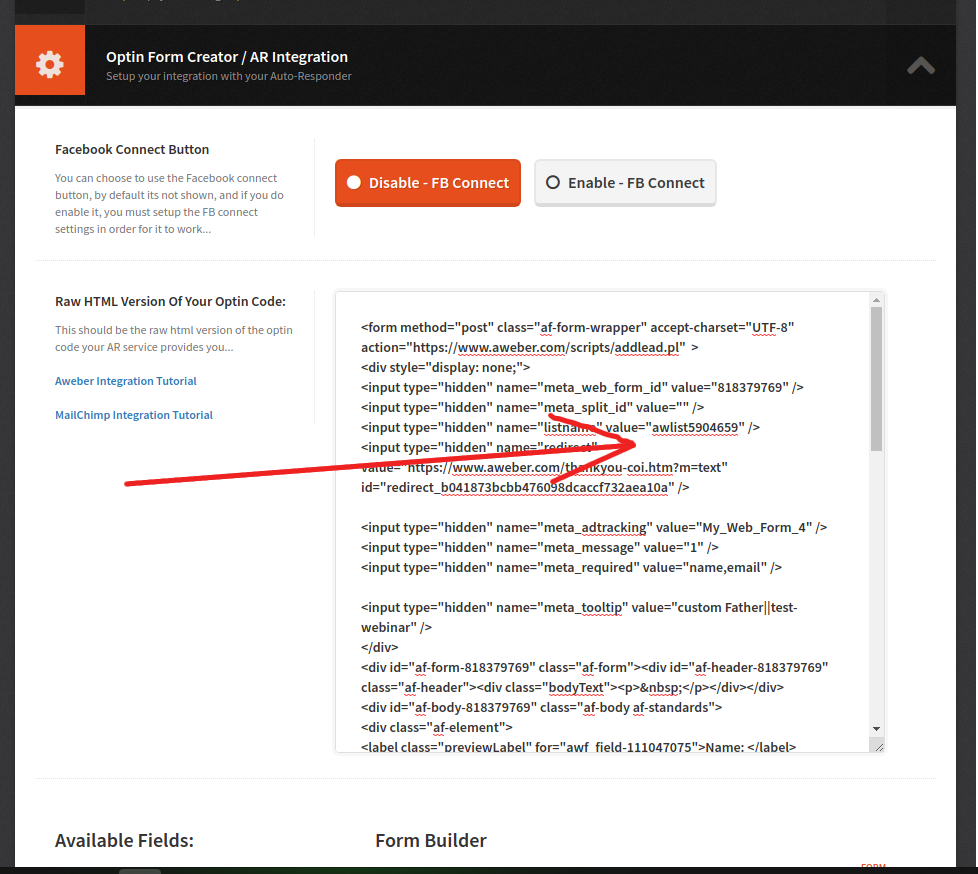
Copy the form html code, then go to your registration page settings and paste the code in the “Raw HTML Version Of Your Optin Code” section of the “Optin Form Creator / AR Integration” section. You’re now ready to start mapping the fields.
Mapping The Fields
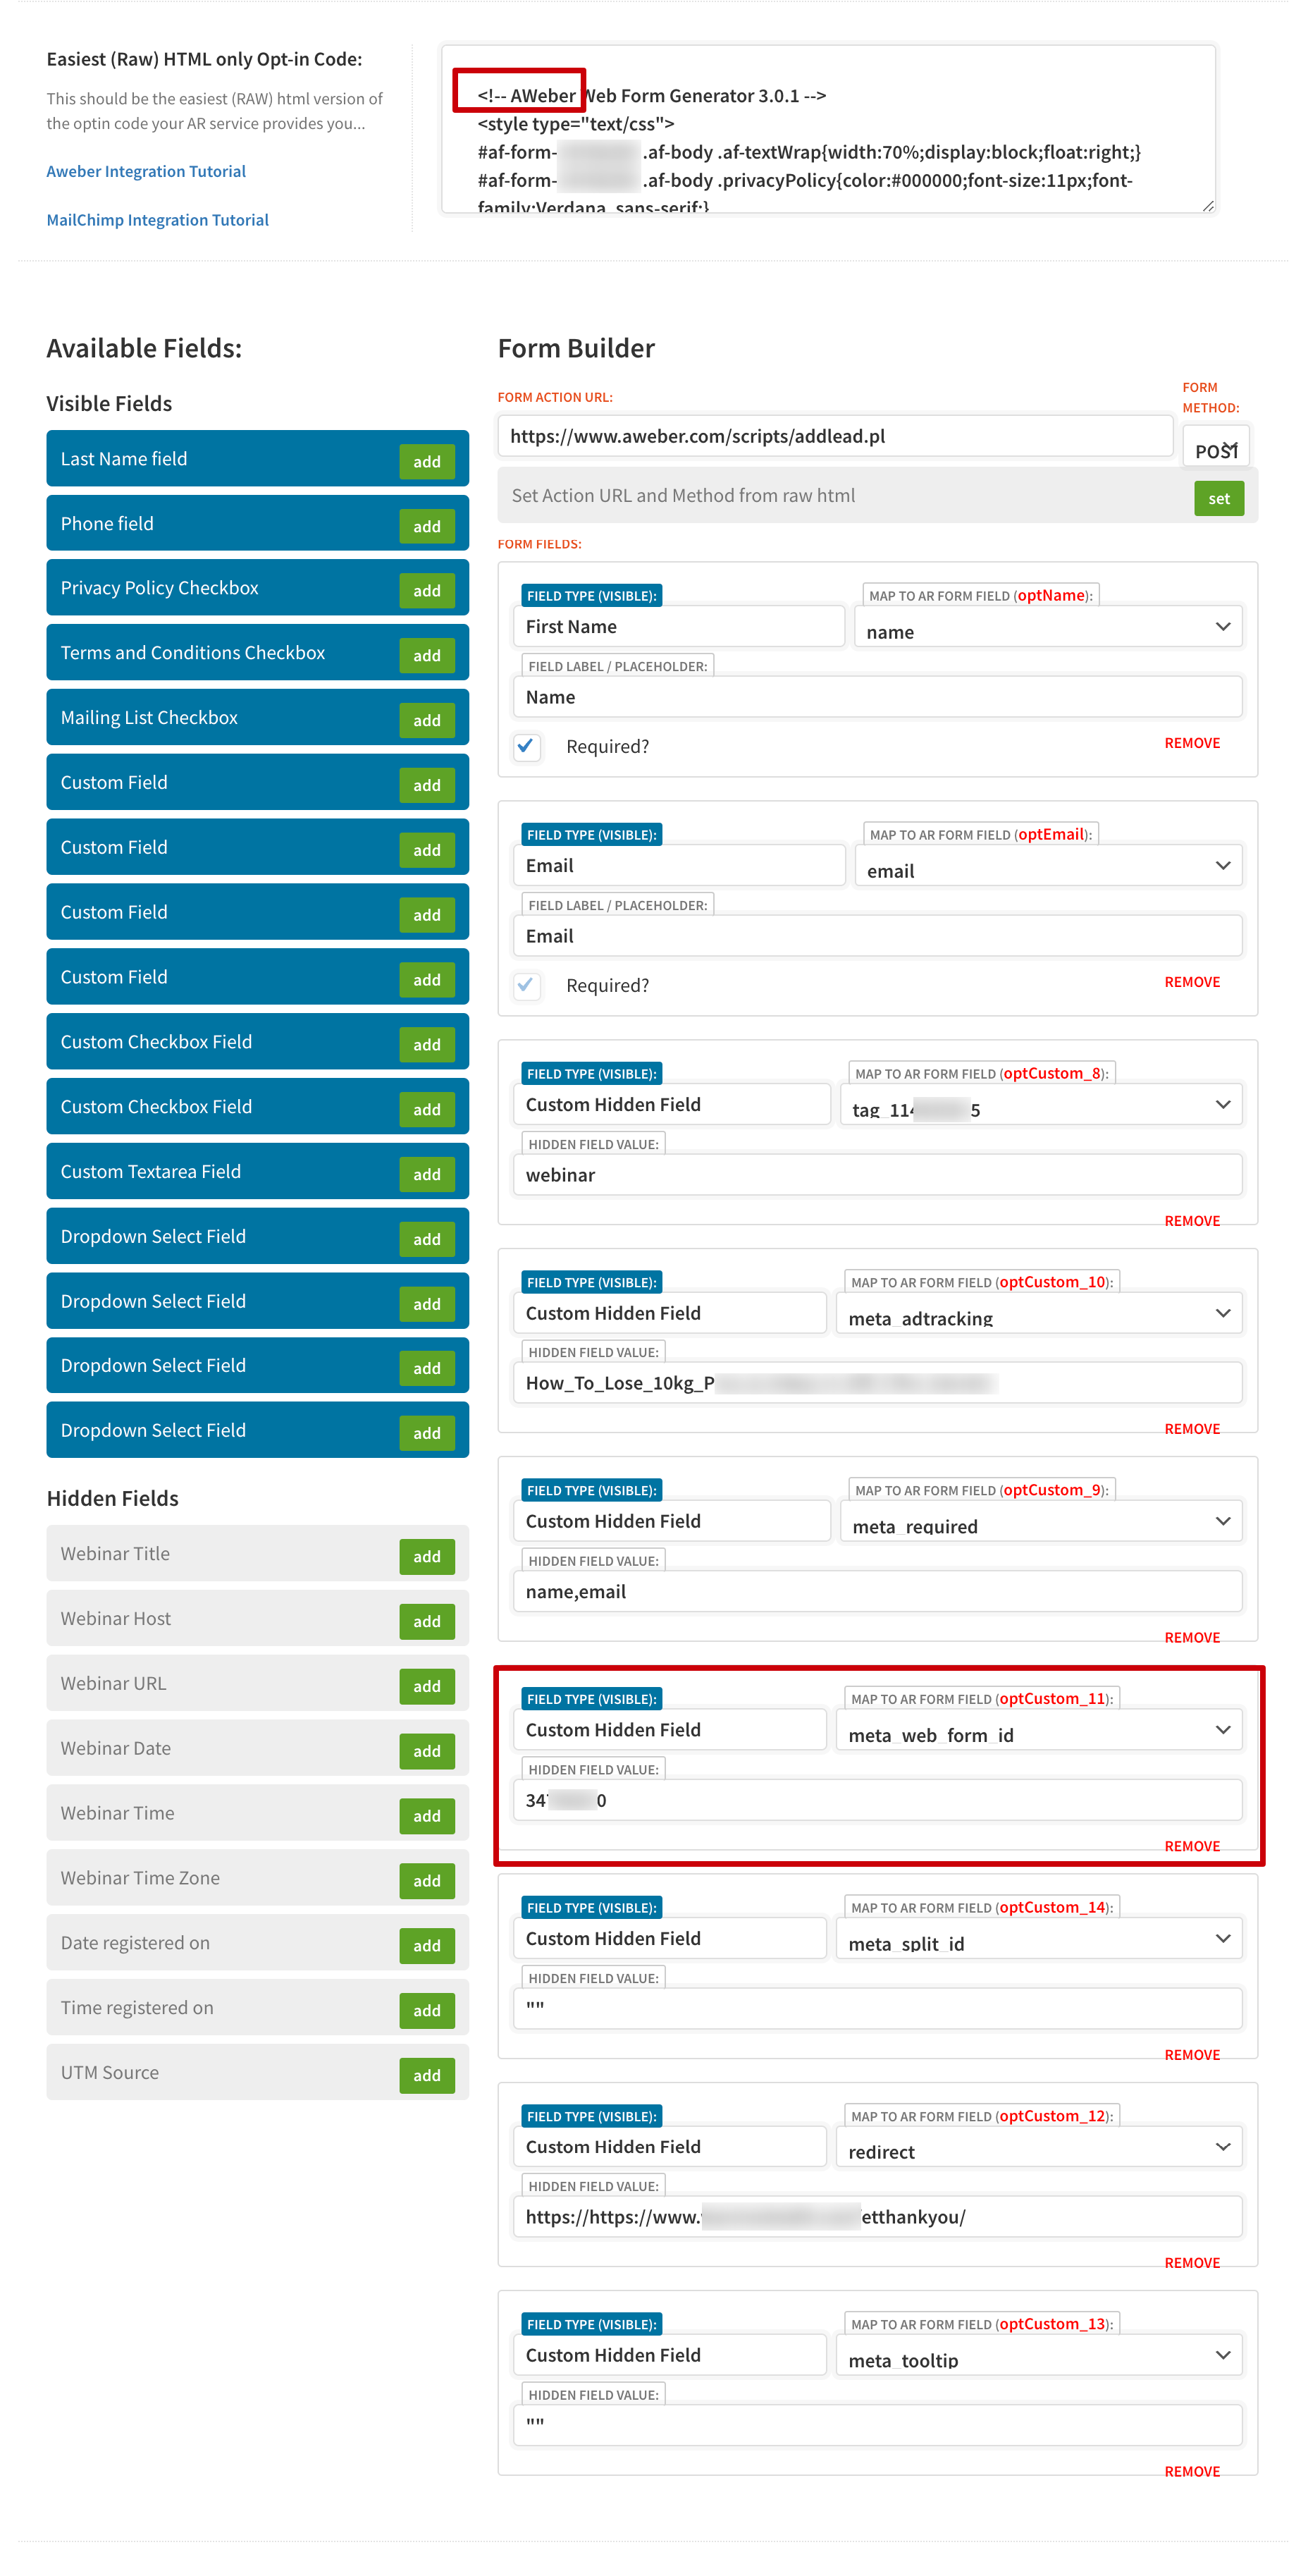
You now need to map the fields in the Webnarignition form to the fields in your autoresponder form so that Webinarignition will know which field data to send to your autoresponder. To do so, first specify the form action url; to do this, click on “SET” in Webinarignition’s Form Builder. This will change the form action url (in Aweber’s case, to something like “https://www.aweber.com/scripts/addlead.pl”)
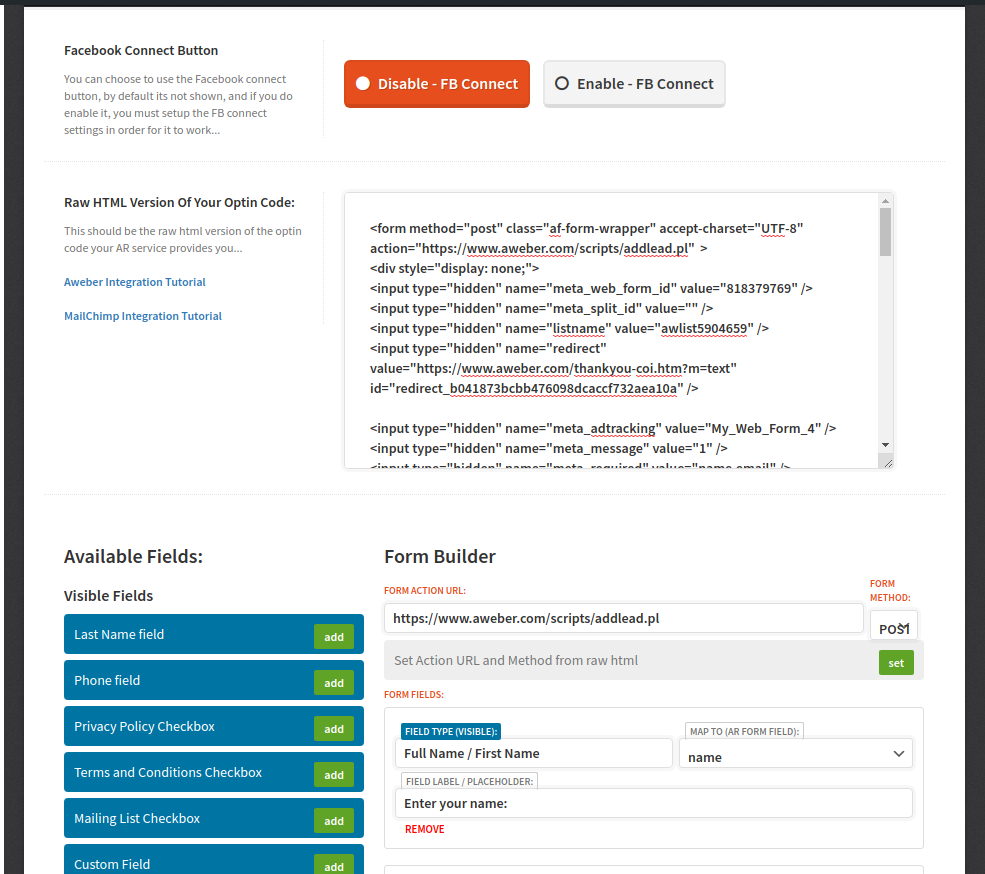
In our case the fields we need to map are the Name, Email, and one custom field called “Webinar” with value “test-webinar.” We will create this latter field as a hidden field in Webinarignition since it does not need to be completed by the attendee; we will manually specify the value for it.
The name and email fields will be shown in Webinarignition’s Form Builder by default. To map the name field, click on the “Map To (AR Form Field)” selection for this field in the form Builder. Since the name of the name field in the autoresponder form is “name,” select “name” (see image below).
Do the same for the Email field: click on the “Map To (AR Form Field)” selection field and select “email”.
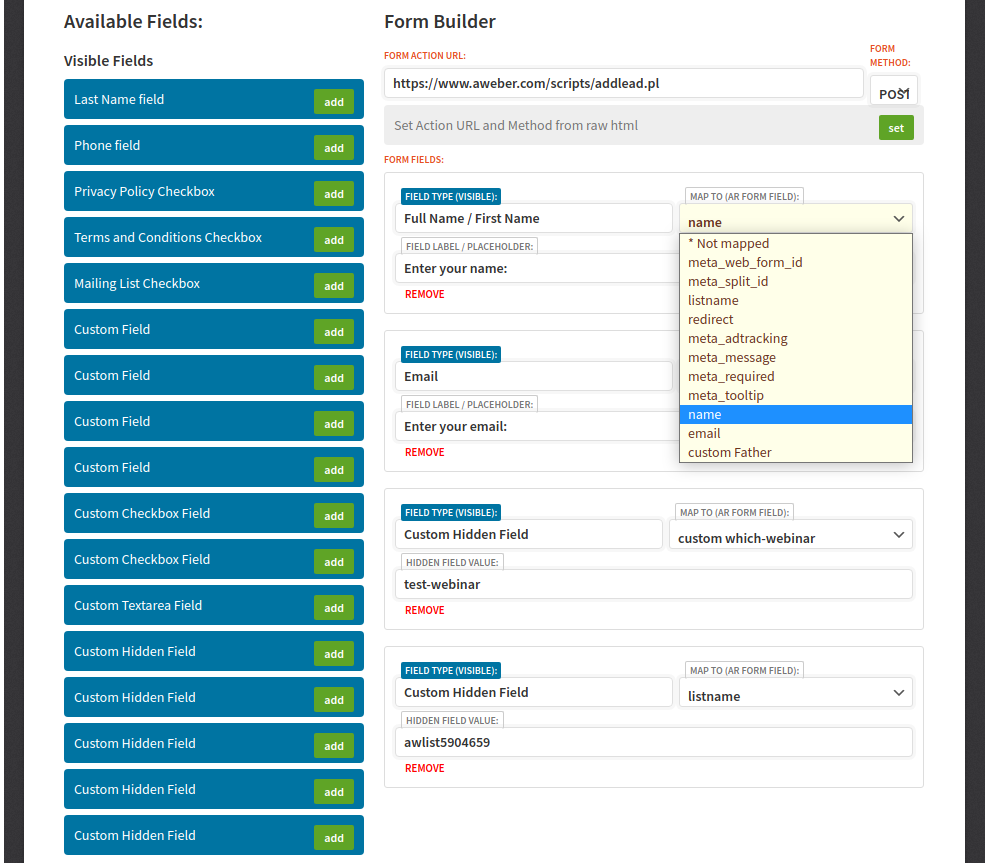
If you have included any custom fields, you now need to map those custom fields you created in Aweber to hidden fields in Webinarignition. Start by dragging a Custom Hidden field from the list of Available Fields (on the left hand side) into the Form Builder (on the right). Now map this field to the Aweber custom field by selecting the name of the custom field in the Aweber form as you did for the email and name fields (in the image, our custom field is named “custom which-webinar”). Next, give the field a value (we have given the field a value of “test-webinar” in our image above).